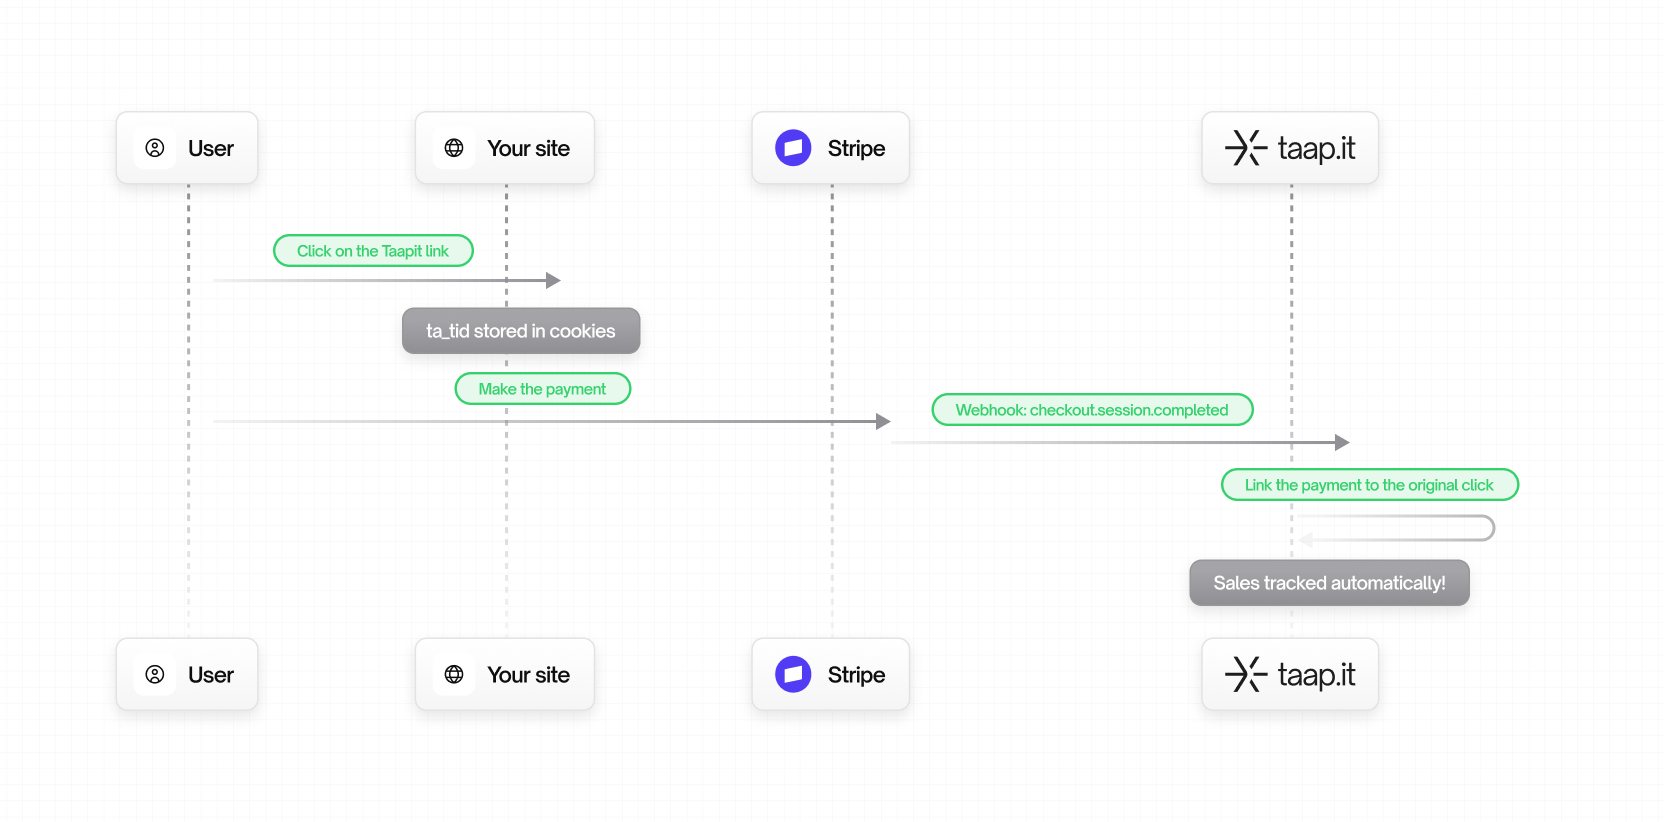
How it works
Prerequisites
Before you start:- Create a Taapit deeplink pointing to your website or landing page
- Enable conversion tracking on your link:
- Go to your link settings in the Taapit dashboard
- Enable Conversion Tracking
- Configure Stripe integration in Settings → Conversion and select Stripe Integration
Installation
Install the Taapit SDK on your website
First, add the Taapit SDK to your website to capture the Then add the Analytics component to your root layout:
ta_tid tracking ID:- NPM Package (React/Next.js)
- Script Tag (No Build Step)
app/layout.tsx
Install the Stripe App
- Go to the Stripe App Marketplace
- Search for “Taapit Conversion”
- Click Install
- Go to Settings → Integrations → Stripe
- Click Install Stripe Integration
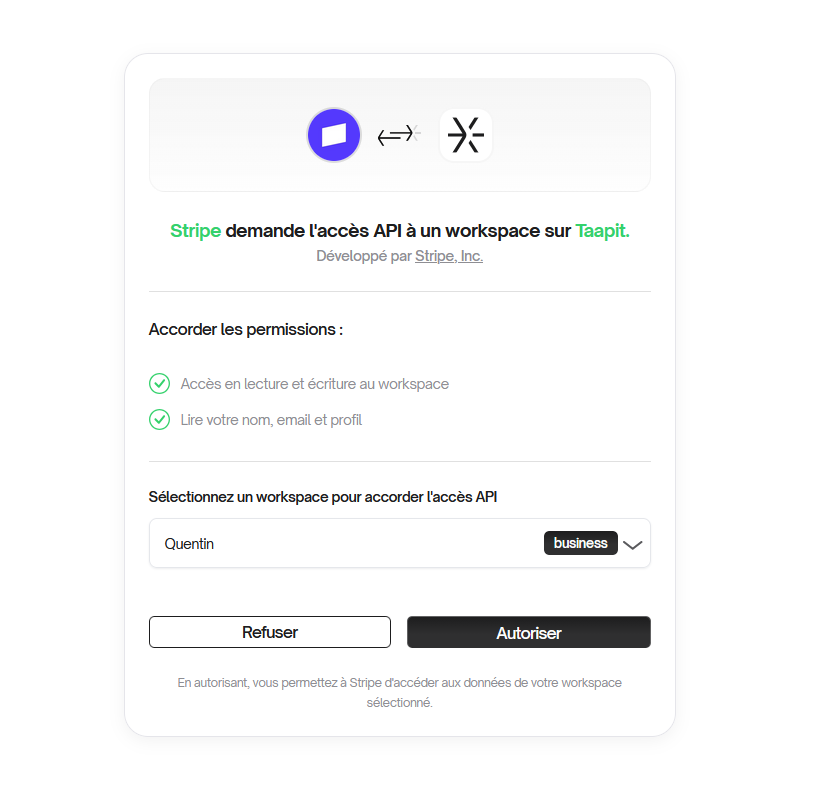
Connect your Taapit workspace
After installing the app in Stripe:1. Open the Taapit app in your Stripe dashboard and click “Connect workspace”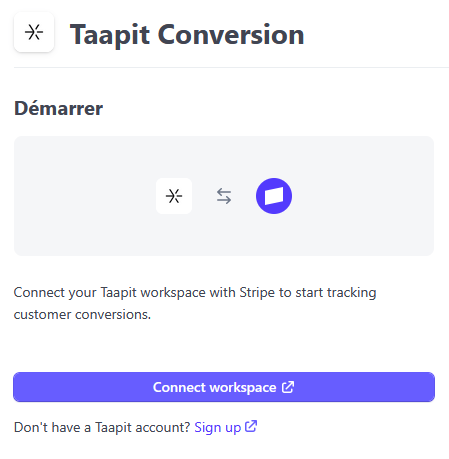

Pass the tracking ID to Stripe
Pass the
ta_tid to Stripe when creating customers, checkout sessions, or payment intents.1. Frontend: Get the tracking ID
First, retrieve the tracking ID from your frontend to pass it to your API:- With Taapit SDK
- With React Hook
The tracking ID can be retrieved from:
- Taapit SDK -
taapit.getTrackingId()oruseTaapitAnalytics()hook - Cookie (
ta_tid) - automatically set by the SDK
2. Track Sales: Create a Checkout Session
When a user makes a purchase, pass the tracking ID in the checkout session metadata.When is
taapitTrackingId required for Checkout Sessions?- If the customer was already tracked via a lead event (using
taapitCustomerExternalId), thetaapitTrackingIdis optional - you only need to passtaapitCustomerExternalIdto link the sale. - If this is a new customer (no prior lead),
taapitTrackingIdis required to attribute the sale.
app/api/create-checkout/route.ts
3. (Optional) Track Leads: Create a Stripe Customer
If you want to track leads separately from sales, create a Stripe customer with the tracking ID when a user signs up. Taapit listens to thecustomer.created webhook.app/api/stripe/create-customer/route.ts
This step is optional. Use it if you want to track user signups as leads before they make a purchase.
4. (Alternative) Using Stripe Payment Links
If you’re using Stripe Payment Links, you can track sales automatically without writing any backend code.How to set it up:- Get your Stripe Payment Link URL (e.g.,
https://buy.stripe.com/xxx) - Add
?taapit_client_reference_id=1to the URL: - Shorten this URL with Taapit
- Replaces
taapit_client_reference_id=1withclient_reference_id=taapit_tid_{trackingId} - Stripe receives the tracking ID as
client_reference_id - When checkout completes, Taapit attributes the sale to the original click
Tracked Events
The Stripe integration automatically tracks these events:| Stripe Event | Taapit Event | Description |
|---|---|---|
customer.created | Lead | Customer created with tracking metadata |
checkout.session.completed | Sale | Checkout session completed |
invoice.paid | Sale | Subscription invoice paid |
Metadata Fields
The integration looks for these metadata fields on Stripe objects:| Field | Required | Description |
|---|---|---|
taapitTrackingId | See below | The tracking ID (ta_tid from the cookie) |
taapitCustomerExternalId | Yes | Your internal user ID |
Use
taapitTrackingId (not ta_tid) in Stripe metadata. The ta_tid is the
cookie name, while taapitTrackingId is the metadata field name.When is
taapitTrackingId required? - Lead events
(customer.created): taapitTrackingId is always required - Sale
events (checkout.session.completed, invoice.paid): - If the customer was
already tracked via a lead event (using taapitCustomerExternalId), the
taapitTrackingId is optional - you only need the
taapitCustomerExternalId - If this is a new customer (no prior lead),
taapitTrackingId is required to attribute the saleTroubleshooting
Conversions not appearing
Conversions not appearing
- Check metadata: Ensure
taapitTrackingIdis in your Stripe metadata - Verify webhook delivery: In Stripe → Developers → Webhooks 3. Check connection: Settings → Integrations → Stripe should show “Connected”
Tracking ID missing
Tracking ID missing
If the tracking ID is empty, the user either: - Didn’t come from a Taapit
link - Has cookies blocked - Cookie wasn’t passed to checkout This is normal
for organic/direct traffic.
Security
| Permission | Purpose |
|---|---|
customer_read | Read customer information |
subscription_read | Read subscription data |
invoice_read | Read invoice amounts |
checkout_session_read | Read checkout session metadata |
webhook_read | Receive payment events |
FAQ
Do I need to install the SDK?
Do I need to install the SDK?
Yes, you need the Taapit SDK on your website to capture the
ta_tid cookie.
The Stripe app only handles payment tracking.How are subscription renewals handled?
How are subscription renewals handled?
Each
invoice.paid event triggers a sale. The tracking ID from the original
checkout is used for attribution.What about refunds?
What about refunds?
Currently, refunds are not automatically tracked. We’re working on this
feature.
Next Steps
Shopify Integration
Set up automatic tracking for Shopify stores.
Manual Integration
For custom payment flows.